Hey, I’m Zathong and this guide is about Overwatch 2 tier list for 2023. I will help you choose the best heroes in the current meta and ranks every hero in Overwatch 2 from the least viable to the best.

Overwatch 2 Tier List
Tier list is a tool that allows players to see which heroes are performing well in the current meta.
Overwatch All Heroes Tier List
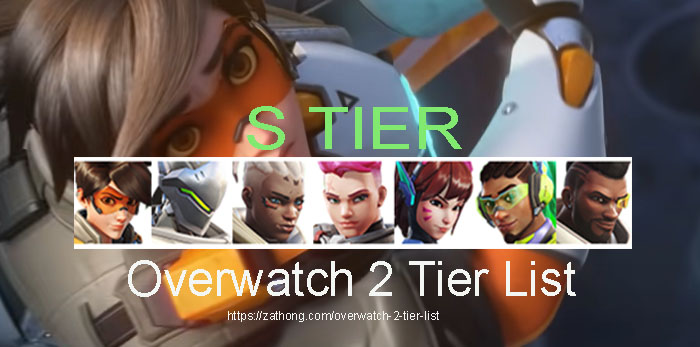
Tracer, Genji, , Sojourn, Zarya, D.Va, Lucio, Baptiste are best heroes for meta current.
Tier | All Heroes |
---|---|
S | Tracer, Genji, Sojourn, Zarya, D.Va, Lucio, Baptiste.![]() ![]() ![]() ![]() ![]() ![]() ![]() |
A | Sombra, Ashe, Reaper, Ana, Kiriko, Zenyatta, Moira, Sigma, Orisa, Winston.![]() ![]() ![]() ![]() ![]() ![]() ![]() ![]() ![]() ![]() |
B | Hanzo, Widowmaker, Cassidy, Mei, Echo, Pharah, Soldier: 76, Wrecking Ball, Junker Queen, Reinhardt, Brigitte, Mercy.![]() ![]() ![]() ![]() ![]() ![]() ![]() ![]() ![]() ![]() ![]() ![]() |
C | Bastion, Symmetra, Junkrat, Doomfist, Roadhog, Torbjorn.![]() ![]() ![]() ![]() ![]() ![]() |
Overwatch 2 DPS Tier List
Tracer, Sojourn, Genji are best DPS heroes for meta current. DPS heroes gain a 25% movement speed and reload speed buff for 2.5 seconds after an elimination.
Tier | Damage (DPS) Heroes |
---|---|
S | Tracer, Sojourn, Genji.![]() ![]() ![]() |
A | Sombra, Reaper, Ashe.![]() ![]() ![]() |
B | Hanzo, Cassidy, Widowmaker, Echo, Pharah, Mei, Soldier: 76.![]() ![]() ![]() ![]() ![]() ![]() ![]() |
C | Bastion, Junkrat, Torbjorn, Symmetra.![]() ![]() ![]() ![]() |
Overwatch 2 Tank Tier List
D.Va, Zarya are best tank heroes for meta current. Tank heroes now have 30% knockback resistance against crowd control abilities and provide 50% less Ultimate charge when damaged.
Tier | Tank Heroes |
---|---|
S | D.Va, Zarya.![]() ![]() |
A | Orisa, Sigma, Winston.![]() ![]() ![]() |
B | Junker Queen, Wrecking Ball, Reinhardt.![]() ![]() ![]() |
C | Roadhog, Doomfist.![]() ![]() |
Overwatch 2 Support Tier List
Lucio, Baptiste are best support heroes for meta current. Support heroes now heal 15 hit points per second when out of combat
Tier | Support Heroes |
---|---|
S | Lucio, Baptiste.![]() ![]() |
A | Kiriko, Ana, Zenyatta, Moira.![]() ![]() ![]() ![]() |
B | Mercy, Brigitte.![]() ![]() |
C | none |
S Tier
Good tier heroes. They perform well on practically any game and are significantly difficult to counter and with the right usage.

Tracer: When playing Tracer, do not be afraid to flank and harass the enemy backline in order to draw more attention and fire away from your tanks. This can create openings for Tank heroes to press the advantage. On the flip side, always be sure to have an escape route for when the odds inevitably turn against you.

Genji: Genji is a Damage hero with incredible vertical mobility, so use Wall Climb to steal high-ground advantage from enemies whenever possible. Using Swift Strike to launch yourself up in the air can help you combo your Dragonblade Ultimate with Ana’s Nano Boost Ultimate.

Sojourn: Sojourn’s Disruptor Shot ability is great not just for doing damage or slowing enemies but it can also “zone” enemies by cutting off small avenues or narrow spaces from incoming enemy players. Remember that her Disruptor Shot is an orb and not a dome, so you can fire it and stick it to the sides of objects in the environment.

Zarya: Pop Zarya’s Particle Barrier on yourself when enemies are already actively firing at you in order to increase the amount of Energy you generate. Be strategic when placing Projected Barriers (or “bubbles”) on your teammates to protect them during crucial moments (such as Pharrah’s Barrage or Mercy’s Resurrection).

D.Va: Be mindful not to use your Boosters to fly too far into the enemy backline before the end of the boost duration. Press Boosters a second time while the ability is active to cancel the effect. Using boosters to knock supports out of position is a great way to neutralize the enemy support line without diving in too deep. Save your Defense Matrix not just for enemy projectiles but use it to absorb powerful enemy abilities such as grenades.

Lucio: Try to use Wall Ride as much as possible. Conserve your Speed Boost for when your team pushes onto the enemy team, or attempts to take the payload or objective. Be mindful of using your Sound Barrier when there is a Sombra on the enemy team. If Sombra uses her EMP Ultimate while Sound Barrier is active, Sombra’s ultimate will cancel Sound Barrier’s effects. Instead, wait for Sombra to use her ultimate first to be sure Sound Barrier will not be canceled.

Baptiste: Baptiste’s healing capabilities will always be strong, but the nature of his Biotic Launcher, which only affects the area of impact, makes Baptiste most effective when the map or game mode requires your allies to stay grouped up. Use Baptiste’s jump to reach higher platforms, giving yourself both a better angle on healing your allies and a view of incoming enemies.
A Tier
These heroes are powerful and are part of the meta. They excel at what they do and perform well on practically any game.

Sombra: You can now see enemies that are half-health outlined through the map, and ping them to reveal their location to your teammates. This is especially useful for calling out flanking enemy players before they can pick off your Support heroes.

Ashe: While Ashe’s secondary fire is more powerful and accurate, don’t be afraid to use the hip fire from her semi-automatic rifle. By aiming the Coach Gun at the ground beneath your feet, you can use Coach Gun to propel yourself to higher platforms.

Reaper: Dealing damage to enemy players heals you, but do not let that trick you into thinking you can take on a 1v5 fight against the enemy team. The Reaping passive ability gives you more survivability when picking off supports in the backline or when flanking in general.

Ana: Positioning is everything. Take the high ground whenever possible and practice throwing your Biotic Grenades or “antis” so that your grenades arc and land where you want them to.
Use the new ping system to point out enemies hit with Sleep Darts (or “sleeps”) to teammates.

Kiriko: Kiriko is a versatile Support hero tasked with protecting the Kanezaka shrine and now with helping Overwatch. Sending out your Ofuda rapid-fire can keep an ally who’s only being peppered with damage topped off, but you get more burst healing when all five of your paper tags are available. Wait for all your Ofuda to return to you before sending out healing for maximum effect.

Zenyatta: Use Snap Kick to “boop” enemies off map edges or launch them away from your fellow Support heroes. If you put your Orb of Discord on enemy players that your teammates have already focused on it increases the odds of your team finishing the target off quickly.

Moira: Moira’s Biotic Grasp healing will continue to do some passive healing on targets after it touches them, so you do not have to give the Biotic Grasp healing too much juice to top off your teammates. Tap your primary fire to conserve your healing reserves when necessary.

Sigma: Use Gravitic Flux at opportune moments such as mitigating an enemy player’s Ultimate or holding enemies in place while your teammates use their Ultimate (such as Pharah’s Barrage or Genji’s Dragonblade). Do not be afraid to recall your Experimental Barrier so you can place another in a better position.

Orisa: Orisa’s Terra Surge Ultimate pulls enemies in closer to you, making it the perfect Ultimate for combo-ing with other teammates’ Ultimate abilities. You can execute Orisa’s Terra Surge Ultimate ability before it is fully charged, should you realize you need to reposition quickly or for any other reason. Look for an opportunity to aim your Energy Javelin at enemy players when there is a wall behind them to deal extra damage.

Winston: Winston’s Tesla Cannon can do steady damage from a fair distance, but you can use the burst from Winston’s Tesla Canon secondary fire to finish off low enemies. His Primal Rage Ultimate ability can be used to “zone” enemy teams as well as killing low-health targets.
B Tier
Viable heroes. These heroes are impressive and are great at their role. They generally perform well on practically any game.

Hanzo: Much like Widowmaker’s sniper rifle, the longer you hold your arrow, the more damage it does. Storm Arrows is an effective ability to finish off low enemies, especially considering it does reduced damage.You can fire your Sonic Arrow ability at an enemy spawn room, particularly while on the defending team, to determine which heroes the enemy team has.

Widowmaker: Take your time with your shots. The longer you charge up your Widow’s Kiss sniper rifle while scoped, the stronger your shot will be. Part of Widowmaker’s power is simply the intimidation of knowing she could kill a player peaking out of safety with one-shot.

Cassidy: Try to be precise when aiming Cassidy’s Magnetic Grenade at an enemy. If you stick the Grenade to an enemy, it will deal extra damage. Take advantage of high-ground positioning whenever possible.

Mei: Use Mei’s Ice Wall to cut off overextending enemy players from the rest of their team. You can also put up Mei’s Ice Wall to create a shield for yourself and your team when you need to pull back from the fight or take a moment to recoup.

Echo: Use Echo’s Focusing Beam to finish off low-health targets. This ability deals extra damage to half-health enemies, making her the ideal Damage hero to fly above the enemy frontlines to pick off squishy enemy heroes.

Pharah: You can use Pharah’s Jump Jet ability in combination with aiming Concussive Blast at your feet to launch yourself farther backward. This ability combination is especially useful for propelling yourself quickly out of the spawn room at the start of a match.

Soldier: 76: Aim more consciously when using Soldier’s Tactical Visor Ultimate, particularly now that you can get headshots while Tactical Visor is active. There is a gradual upwards drift as you continue to shoot Soldier’s primary fire. If you struggle with hitting your shots, try aiming for the chest first and you might be more likely to get a headshot.

Wrecking Ball: Use the knockback from Wrecking Ball’s Roll to move enemy players out of position, making them more vulnerable to your Damage teammates. While Wrecking Ball’s Adaptive Shield ability can be used to get you out of sticky situations. Remember that Grappling Claw now only lasts about six seconds before the grapple “decays”, so try not to rely on it to hang off edges for too long or use it to spin around objectives for too long.

Junker Queen: Sinking Junker Queen’s Jagged Blade into an enemy across a steep drop and then recalling it can instantly send them pummeling off the map. Use Commanding Shout to give you and your teammates a speed boost out of the spawn room, or to launch yourselves quickly onto the objective. Carnage is great for more than just finishing off low-health targets.

Reinhardt: Move your mouse in the same direction as Reinhardt’s Rocket Hammer to give his melee attack more effect. Now that your Fire Strike ability has two charges, you can use your Fire Strike more frequently. Fire Strike is a great ability for finishing off a low-health target or effectively “sniping” an enemy player from afar.

Brigitte: You can use Brigitte’s Shield Bash to travel forward more quickly. Shield Bash could even be used as a quick burst of speed to escape the range of an enemy Ultimate. Combo your Whip Shot and Shield Bash to send an enemy flying back into the enemy backline or even off the edge of the map.

Mercy: Although Mercy’s “Super Jump” ability from the original Overwatch is now fully incorporated into her kit, the vertical mobility of her Guardian Angel is slightly reduced. Using Mercy’s Guardian Angel ability to launch yourself onto the high ground when possible can help propel yourself out of danger and give you a better overview of your entire team.
C Tier
Heroes with average performance. Heroes generally don’t do well in the current meta.

Bastion: Play more offensively while in Bastion’s Assault configuration. The Assault configuration does have a cooldown, so use it tactically. Some good uses would be to swiftly break an enemy shield, pick off an Ulting enemy, or finish off a bunch of low health targets quickly.

Symmetra: Use your ping to point out Teleporters to teammates. Calling out Teleporter location is especially important now that Teleporters only last for a short duration. Putting your Sentry Turrets in clusters can make it easier for enemies to take them out, but the trade-off is that the more Sentry Turrets are focused on a singular target, the more damage your Turrets will do.

Junkrat: Be sure to ping any enemies that get stuck in your Steel Traps so that any nearby teammates can take advantage of the opportunity to finish the enemy player off before they escape. Small corridors and other narrow areas are generally great places to place your Steel Traps.

Doomfist: While Doomfist is a powerful “zoning” Tank, excellent at intimidating the enemy team into backing up, be wary not to leave your team in the lurch by “overextending”. When you travel too far into the enemy’s position on the map, or out of your Support’s line of sight, your teammates will not be able to help you should you get into a sticky situation.

Roadhog: Practice using Roadhog’s Chain Hook ability to drag enemies off the edge of the map. This ability makes Roadhog especially useful on maps with lots of edges and steep drops (such as Ilios or Nepal). Roadhog’s Whole Hog Ultimate is particularly useful when used on enemies grouped up, particularly near the edge of the map, whether that edge is a steep dropoff or a corner.

Torbjorn: Experiment with the placement of Torbjorn’s Turret. The ideal position for the Turret is somewhere where it can do a lot of steady damage on incoming enemies without being easily burst down by enemy fire.
Conclusion
Overwatch 2 is game requires communication and time investment to excel in it. You need talk with your team to make sure you have the same game plan and pick the hero that fits.